
Thursday, August 9, 2012
Wednesday, August 10, 2011
Meteor Shower This Weekend
The Perseid Meteor shower peaks this weekend.
Some links to Meteor Photography Tips:
Link 1
Link 2
Link 3
Link 4
Link 5
Some links to Meteor Photography Tips:
Link 1
Link 2
Link 3
Link 4
Link 5
Thursday, September 30, 2010
Digital Photography Bootcamp
"Big Bucks Selling Your Photography" was not at all what I expected from the title. However don't get hung up on that! The subtitle on this fourth edition nails the book contents. "A Complete Photo Business Package for all Photographers" is a more apt title and this book does deliver that.
Monday, September 27, 2010
Sunday, September 26, 2010
Digital Pinhole Anyone? (part 2)
If you've been following the Digital Pinhole stuff, here is part 2 in the series on how to make a body cap pinhole lens.
Saturday, September 25, 2010
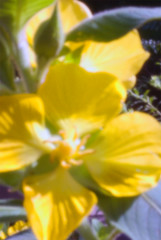
Yellow-Flower-Pinhole
Closeup of a yellow flower
Full frame
Taken w/ Pentax K10d w/ homemade body cap pinhole lens (the one I made for the blog post)
1/2 ISO 400 full sun
Subject about 2 inches from lens
Full frame
Taken w/ Pentax K10d w/ homemade body cap pinhole lens (the one I made for the blog post)
1/2 ISO 400 full sun
Subject about 2 inches from lens
Digital Pinhole Anyone? (part 1)
Ever wondered what how to make a digital pinhole camera? It only takes a couple items to make one and one of those items you may have already... your digital SLR camera.
Saturday, September 18, 2010
Opening the K10D Body
I'm not sure if anyone is quite ready to do this just yet, I'm not, but just in case here are the instructions to remove the body covers on the Pentax K10D.
Friday, August 27, 2010
K10D FAQ
Cruising the internet for Pentax K10D sites I came across some interesting things. Here is one of them.
Subscribe to:
Posts (Atom)