
Using a black body cap with a hole drilled in the center and a piece of aluminum soft drink/beer can you can turn your digital SLR into a digital pinhole camera.
MATERIALS NEEDED
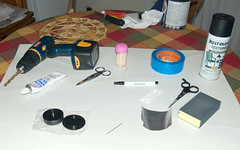
1. Body cap that fits your camera
2. Soda can for aluminum sheet
3. Silicone adhesive
4. Flat black paint / large sharpie marker
TOOLS NEEDED
1. Large sewing needle
2. 1/4" (apx) drill bit
3. Drill (optional)
4. Heavy duty scissors
5. Paper scissors
6. Tooth picks (or similar)
7. 600-800 grit sanding block/paper
8. Center punch (optional)
9. Tape (to hold aluminum while glue dries and mask body cap during painting)
The body cap has to be black and can't be the white translucent one like the one that came with my K10D.
If you don't have a black body cap you can find them for sale on e-bay for practically nothing and they come with a rear lens cap too. I bought a set of 4 for less that $8 and the shipping was free. The only drawback was these come from Hong Kong so they can take like a month to ship. If you need one sooner try an American store
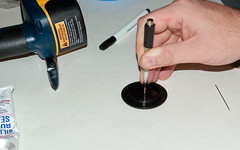
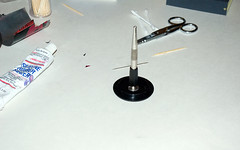
Mark a dimple in the center of the body cap with the center punch tool. A nail or similar tool will work also. If you are comfortable drilling straight without the center punch guide go for it.
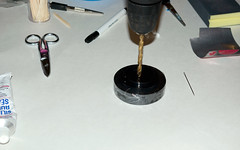
Drill a 1/4" (or close to that if you don't have a 1/4" bit, a smaller hole may vignette) in the center of the cap. Clean around the edges of the hole so there is no shavings that could come loose and fall in the camera or get in the way of the light path and cause problems with the image. You could also get fancy and use a counter sink bore to make the exterior of the body cap hole larger so it won't vignette the image. If you want a vignette then drill a smaller hole.
Slowly drill (or hand twist the bit) a hole in the center punch dimple. Clean up the edges so they look smooth and there are no jagged edges around the hole.
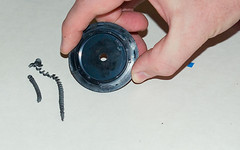
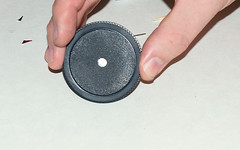
Body cap with 1/4" hole drilled in the center.
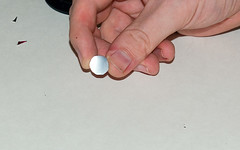
Cut a 3/4"x 3/4" (apx) square piece from the aluminum sheet.

Round off the corners of the square so there are no sharp edges to cut yourself.
Using a sewing needle or a shirt pin (the pins that came with your new button up shirt) or a pushpin from the cork board in the office, slowly bore into the center of the 3/4" square piece of aluminum. Once the pin has made a dent in the other side of the metal take some fine emery cloth and sand the bump down. This should open up the hole. If not bore a little more and apply a little more emery cloth to the back side.
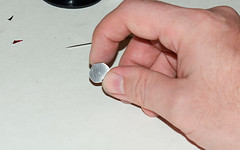
Using the heavy sewing needle gently push a dimple into the aluminum. Do not go all the way through as the hole will appear when the dimple is sanded.

Here is the dimple (top side) and it has not made a visible hole yet.

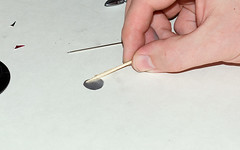
Rub the dimple side (bottom side) gently on the 600-800 grit block/paper.

After the dimple is sanded away a small hole should appear in the aluminum. Use the needle once more to gently round out the hole (both sides).
The diameter of the hole does not need to be exact and we can't take precise measurements of a hole that small anyway. However there is an "optimum" hole size for the focal length on the K10D and all Pentax K mount cameras since the film plane is the same depth for all K mount bodies (45.46mm).
If you measure the distance from the pinhole location on the inside of the body cap to the "film" plane it measures approximately 45mm. This will vary depending on what body cap you use. Using 45mm as the focal length then the "optimum" pinhole size is around 0.3mm. 0.3mm is just smaller than the diameter of a #12 sewing needle, however a #12 needle is too thin to bore through metal so only use a #12 as a guide to determine the hole size and use just the point of a thicker needle to put a bump in the opposite side of the metal and use the fine emery cloth to sand down the bump and exposing the actual pinhole. This way you get a nice narrow round hole with no jagged edges. Also you can always use more boring and sanding to make the hole larger but once the hole is too big it can't be made smaller. But don't worry, if you mess up the pinhole you can always cut another piece of metal from the can.
Rinse the metal plate to get rid of any metal fragments from the sanding process. Even better would be to use some rubbing alcohol to give it a good final cleaning as finger oil can gum up the roundness of the hole and affect the image.
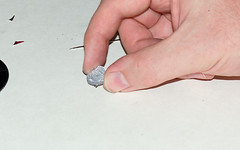
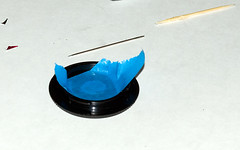
Place a very thin layer of silicone adhesive around the outside of the aluminum disk. Too much adhesive will smear all over the disk and into the hole making a mess and possibly ruining the disk.
The adhesive should look like this when applied.
Using some weight push the aluminum disk onto the body cap.
Slide the aluminum disk around until the pinhole is centered in the 1/4" drill hole.
Carefully tape the aluminum disk to the body cap ensuring the pinhole is still centered in the 1/4" drilled hole. Allow adhesive to completely dry.
We'll finish the pinhole lens in part 2.
Body Caps
No comments:
Post a Comment